

 By
By 
Do you have keys or assets that someone typically uses together? Say your HR manager needs to retrieve some office supplies for a new hire from a closet in Building A. Since Building A remains locked, the manager will need the keys to both the closet and Building A. In your KeyTrak Edge system, you can associate those key tags so users know to check them out — and return them — together.
Let’s take a look at how to associate two keys or assets in your system. First, pull up the Add Tag screen. Then, look at the following three fields.

Required With
In the Required With section, you can select key tags that must always be checked out with additional assets. In the example mentioned above, anyone who needs to access the supplies closet will always need the key to Building A.
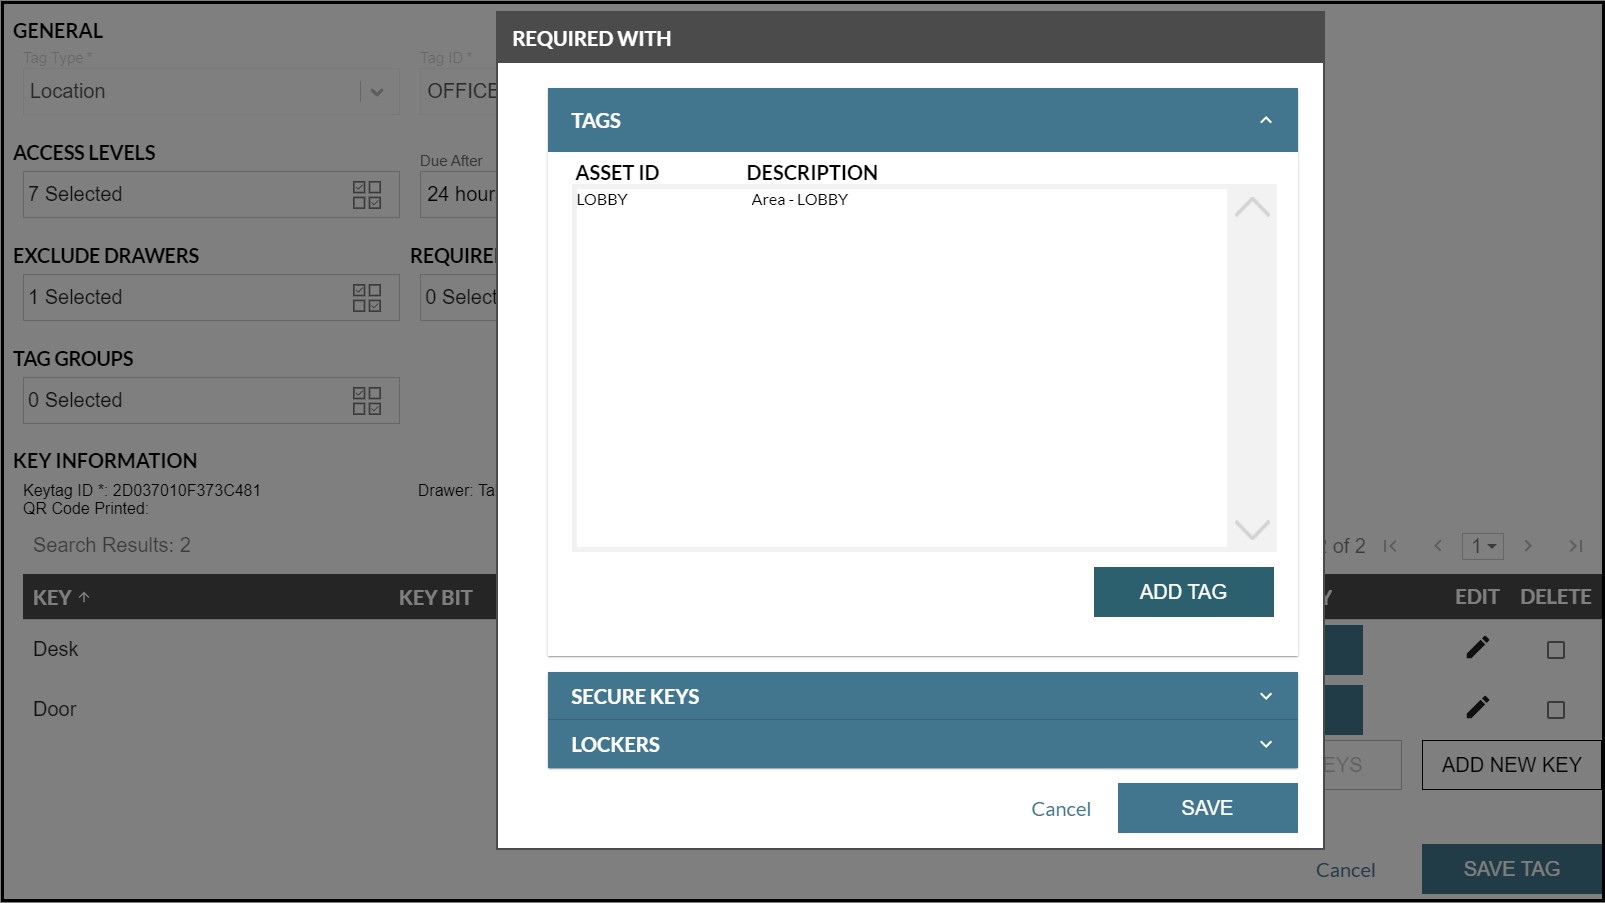
When the user selects a key tag to check out, the Key Selection screen will automatically display an expansion panel with a list of required tags preselected. The user won’t be able to deselect those items.
-1.jpg?width=1040&name=KTEC%20-%20Check%20Out%20-%20Required%20With%20(002)-1.jpg)
Optional With
The Optional With section associates assets that might need to be checked out together, but users won’t be required to check out both items. For example, let’s say Building A is unlocked during business hours. When a user checks out the key to the supplies closet, the system will prompt the user to check out the tag for Building A as well, but they aren’t required to do so.
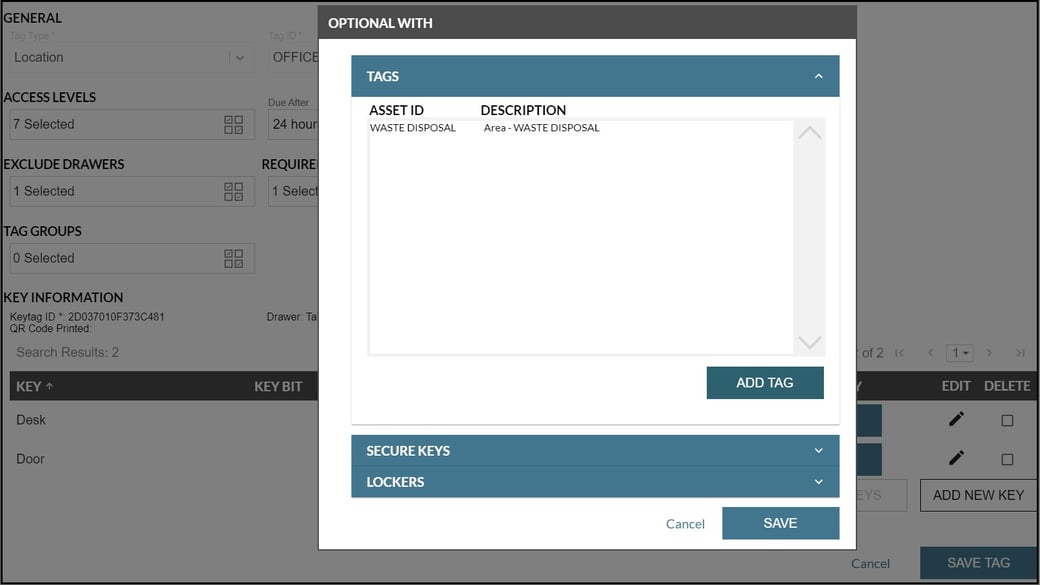
When a user checks out a tag associated with optional assets, they’ll see an expansion panel with a list of those items. They’ll be able to select and deselect tags.
%20(002)-1.jpg?width=1603&name=KTEC%20-%20Check%20Out%20-%20Optional%20With%20(Not%20Selected)%20(002)-1.jpg)
Example Use Cases
|
Due After
In the Due After section, you can set a time limit for each asset. This setting is similar to the Time Limit setting on the Access Levels screen. The difference is the Due After setting allows you to set time limits by asset rather than by users’ access levels.
You can choose from the following intervals for asset time limits:
- 24 hours (default)
- 48 hours
- 36 hours
- 1 week
- 1 month
- No limit

The lowest access level setting takes precedence. For example, if an entry-level employee with an access level limit of 24 hours checks out an asset with a time limit of 48 hours, the system will consider the item overdue after 24 hours.
By associating assets in your KeyTrak system, you’ll make it easier for employees to get the items they need without having to make trips back and forth to the system.
